![[Seeds] - Caribbeangardenseed](http://caribbeangardenseed.com/cdn/shop/files/gift-card-gift-card-1_1024x1024_dfa857db-9150-4315-a362-7f0bb3fb9c47_60x28.png?v=1703978838)
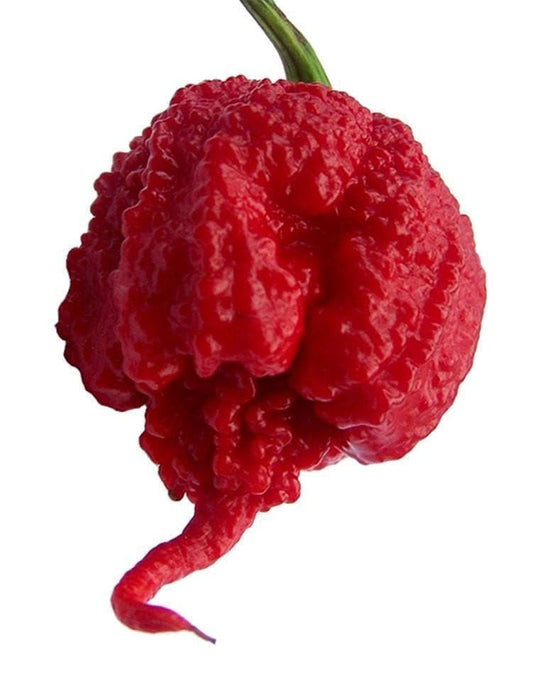
Carolina Reaper Pepper Seeds (Capsicum chinense) Super Hot
Sale
Original price
$ 3.95
Original price
$ 3.95
-
Original price
$ 11.95
Original price
$ 3.95
Current price
$ 3.29
$ 3.29
-
$ 10.99
Current price
$ 3.29
Most orders are processed by the next day
Select your desired size and/or color from the available options.
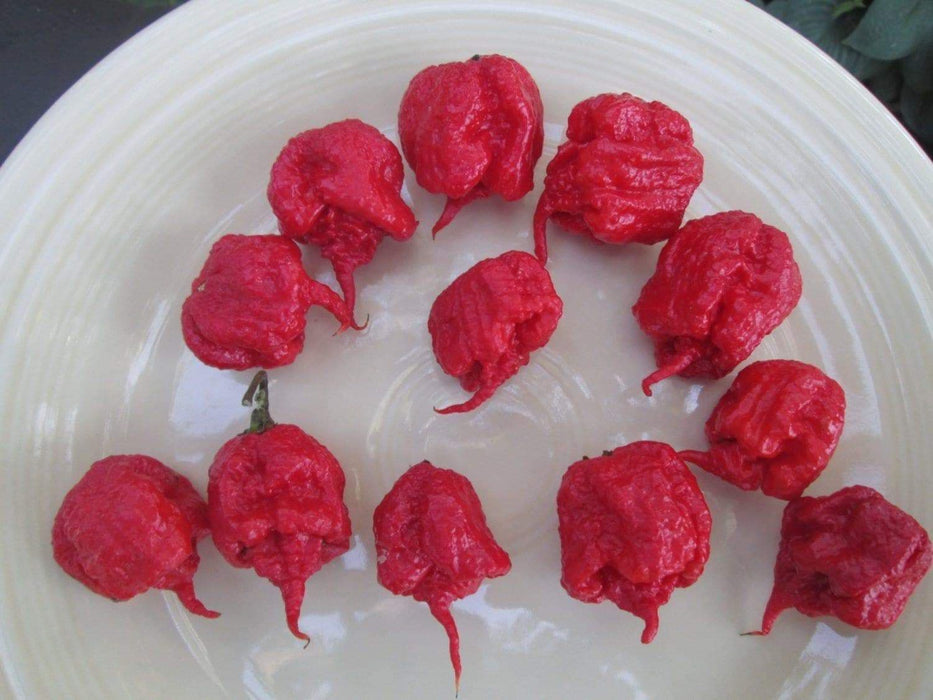
Carolina Reaper Pepper(Organic Seeds) World's Hottest Pepper !
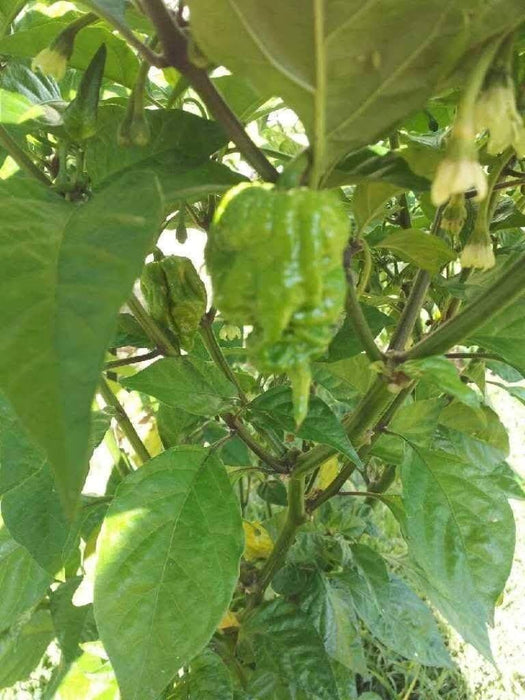
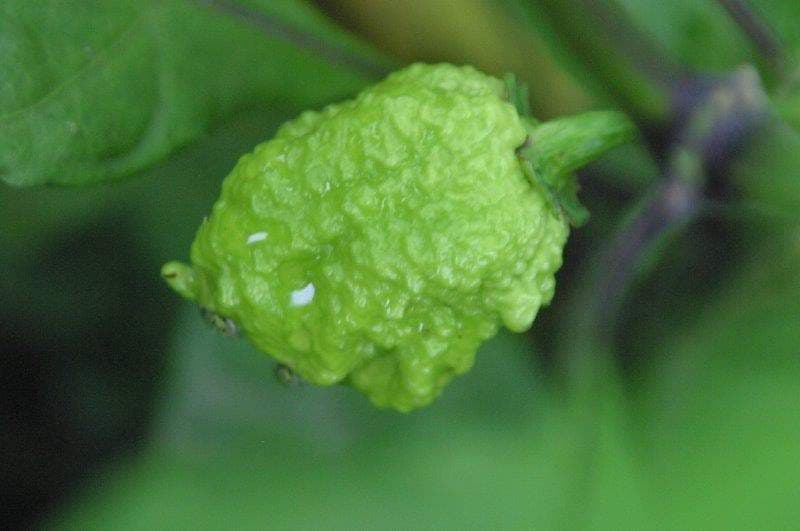
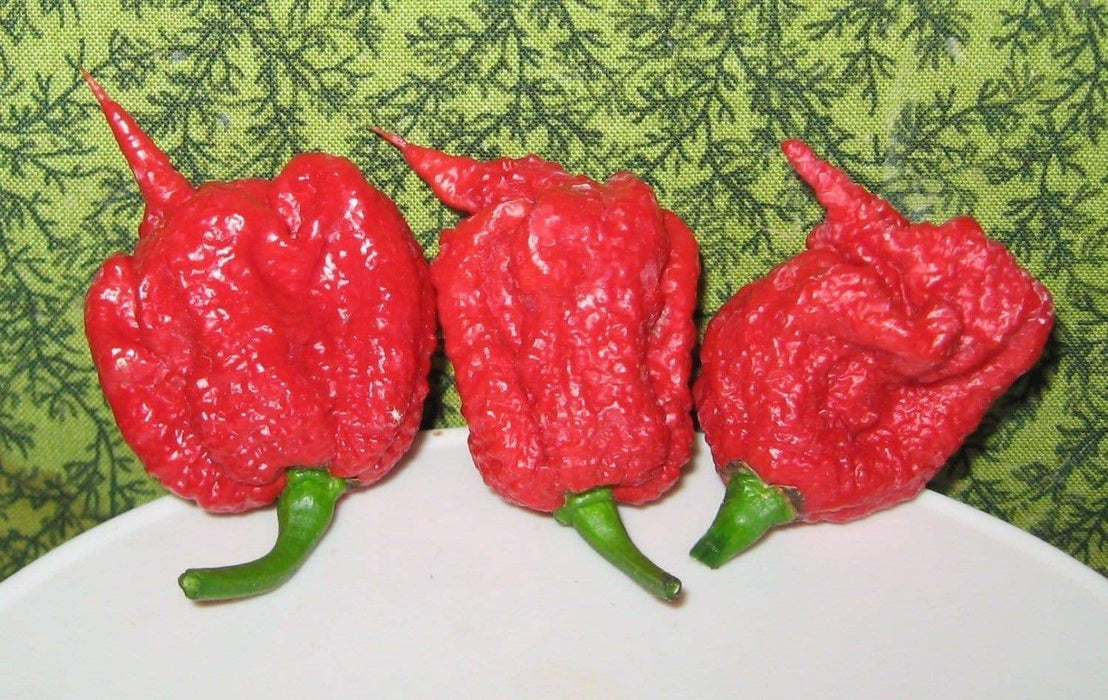
2 to 3 inches long by 1 to 1.5 inches wide; medium thick flesh; matures from green to red; pendant pods; green leaves; 30 to 36 inches tall; Extremely Late Season (120+ days); Here it is, 2013 Guinness Book record holder for the world's hottest pepper, averaging 1.569 million on the Scoville Scale!!
Step-by-step guide on how to germinate your Chilli Seeds
Firstly, we would like to say that there are many different ways to germinate your seeds. Opinions and methods vary and the starting point for any undertaking these days always warrants checking the internet. The internet has a wealth of information on this and there is no hard or fast rule as to how to do this. This having been said, the method we will demonstrate is the wet towel and ziplock method, which is very popular among the chill heads the world over.
When should I start germinating my seeds?
This process takes place indoors, so outside temperatures are not a factor. Although you will require a warm spot in your house for the seeds to germinate. Optimal germination temperatures are 80 - 85 degree and constant. Lower germination temperatures may result in longer germination times and temperatures too low may result in germination not taking place.
What you will need
There are a couple of things you will need to organise to follow this demonstration:
Chilli Seeds
Kitchen Paper Towelling
Plastic Container with lid
Clean Water
Gloves (Latex/Nitrile/Vinyl)
Ziplock bag (min 100x100mm)
Permanent Marker
Lastly, a warm place in the house to put your seeds once you have completed this process. Germination takes place optimally at constant temperatures 80-85. While it is not necessary, having a heating mat does provide your seeds with this constant optimal temperature and will improve germination speed and results. Any serious chilli grower should look into getting one of these heating mats. Heating mats can be found at most Pet Shops.
1 Label, Label, Label
Chilli seeds look alike, so labelling is a vital procedure when growing plants. Packets and containers should always be labelled before you do anything. There is nothing worse than not knowing what you are growing - as it will only become apparent some months later when you have the actual pods to tell the plants apart.
2 Paper Kitchen Towelling
It is important to use Paper Kitchen Towelling as it will not turn to mush when you make it wet. So, no serviettes - it will not work!
We would strongly advise investing in disposable gloves when handling our hot chilli seeds. Once Capsaicin has transferred to your bare hands it will burn your hands and everything your hands make contact with.
Tear a sheet from the roll of Paper Kitchen Towelling.
Fold your sheet in half.
And again.
3 Place seeds in Paper Kitchen Towel
Take your seeds out of the packet and arrange on the Paper Kitchen Towelling that you have folded as shown. Place your seeds on the lower half of the Paper Towelling as this will then be folded again.
Again, we strongly recommend wearing gloves if you are handling our very hot seeds!
Fold the top half of the Paper Towelling over the seeds as shown.
You can fold this again to suit the size of your ziplock bag.
4 Wet the Paper Kitchen Towel with the seeds in it
Take your Paper Towelling with the seeds in and soak in clean water. No hard and fast rule as to how to do this.
You just want to make sure that the Paper Towelling with the seeds in is well soaked with water.
Once soaked, gently squeeze your Paper Towelling to remove excess water. The Paper Towelling with the seeds should be moist but not water logged/squishy.
5 Place in Ziplock bag
Once wet, you can further fold up the Paper Towelling to suit your ziplock bag and insert the wet Paper Towelling into a ziplock bag.
We recommend a ziplock bag for convenience sake, but you can also use a plain plastic bag. Nothing too big though.
The main thing is to seal this bag so the moisture does not evaporate and your Paper Towelling with the seeds does not dry out.
Again, make sure you label as you go. While you know what seeds you have just put in the bag, in a week or two you may not be so clear.
Also, when adding other bags with other seeds to the mix, you will get muddled up if things are not labelled.
It is also a good idea to put the date on your packet so you know when you started germination. This will become important later on.
6 Place in container with lid
Place your ziplock bag in a plastic container with a lid.
Well done! That is it.
7 Place container in a warm spot in your house
Now you will need to put the container in a place in your house where the seeds will be kept warm.
For best germination results, the seeds should be kept at a constant temperature that is between 80 - 850.
For germination to occur, your seeds only require warmth and water. Sunlight does not figure in the equation yet.
With optimal germination conditions, germination can take 10 - 14 days to show any signs of the seeds having germinated.
If your temperatures are lower, germination may take longer.
You can check on your seeds after day 10 by opening the Paper Towelling and looking for little shoots coming from the seeds. Do not get disheartened, this can take longer with certain varieties. All things going well, you will have germination and will need to plant your seeds.
Remove any seeds from the Paper Towel that you will be planting and readseal the package and return seeds to their warm spot so the other seeds that have not germinated can continue germination. Please ensure to reseal ziplock bag properly again!
Step-by-step guide on planting your seedling
Firstly, there are many different methods and opinions on how to germinate and plant your chilli seeds. A good starting point for any undertaking these days is the internet. This is how we germinate and plant our seeds.
What you will need
There are a couple of things you will need to organise to follow this demonstration:
Germinated Chilli Seed(s) (See Above for details)
Perlite or Vermiculite (Available at most nurseries)
Seedling Mix (Available at most nurseries)
Mixing Bowl
Small Planting Pot (Available at most nurseries)
Ruler
Pencil
Masking Tape
Permanent Marker
Chop Stick/Plant Tag/Icecream Stick
1 Germinated Seed
This demonstration is based on the fact that you have already followed our demonstration on germinating your Chillihead seeds (HERE)
If you have been successful with your germination, you will find little shoots coming out of your seeds as shown below. The seed below started germinating just 8 days after having been placed in the wet towel. Yours may take longer, but once the seeds have germinated and you can see a little shoot on the seed as shown below, you can remove the seed from the wet paper towel and plant your seed(s). Return the other seeds that have not germinated yet to the zip lock bag for further germinating.
Please take care when handling these delicate seedlings. It is very easy for the shoots to snap off if not handled delicately!
2 The Seedling Mix
There are a number of commercial Seedling Mixes on the market that are available at your local nursery. Be sure to choose a good quality (fine) seedling mix. The reason we recommend Seedling Mix and not normal Potting Soil is that normal Potting soil has large debris in it. This will create more obstacles for the seedling to get through the soil and thus it will take longer for the seedling to emerge from the soil.
Below you can see the difference between Potting Soil (loads of debris) and Seedling Mix (Fine).
3 The Medium
Take the large mixing bowl and mix your Seedling Mix with the Vermiculite/Perlite - 3 parts Seedling Mix to 1 part Vermiculite/Perlite. Mix it well. This should look like the mixture below. The Vermiculite/Perlite helps create air pockets in the soil. This will be beneficial to the chilli plant.
4 Fill the Plant Pot
Fill your Plant Pot container to about 1cm from the top. Do not overfill, you want a lip so when you water, the water will be contained in the pot.
Make sure you apply slight pressure when filling with the Potting Medium. Not too much pressure, you want the soil in the pot to be slightly compressed, but not squashed solid.
5 Creating the hole for the seed
The hole you make for the seed is quite important. You want the right depth. This can be easily gaged by taking a pencil and masking off (with a piece of masking tape) 1 - 1,5cm from the tip of the pencil. Now use this to make a hole in the middle of the soil in your pot. The pencil should only go as deep as the masking tape you put on your pencil as shown below.
If you make the hole too shallow, the seed may well come out of the soil, but will not loose its husk. Make the hole too deep and it may take much longer for the seed to break through the soil. In our experience 1 - 1,5cm is about right. It allows for the seedling to travel through enough soil to shake its husk and is a good compromise on speed.
6 Plant your seed in the hole
Once the hole is made, drop your germinated seed into the hole. If you can, then with the root/shoot pointing into the hole and the husk ontop. Once in the hole, fill the hole over with potting medium and gently firm down the soil. Unfortunately we could not capture this on camera. But should be easy to comprehend.
7 Label Label Label
Labelling is such an important stage of the growing process. There is truly nothing worse than not knowing what the plant is that you are growing. So Label your plant growing in your pot. Plastic plant tags can be bought at your local nursery, but a good cheaper alternative is an icecream stick or a chop stick. These can be bought on mass and are cheap and will do the job just as well. I have also seen people use plastic disposable knives or plsatic strips cut from a white plastic milk bottle. Please ensure to use a permanent marker. When these get wet, the ink will run or wash off completely if the ink is not permanent!
8 Water your seedling
Once your plant has been planted, water. A little sensitivity is required here. Do not over water. Make sure the soil is moist at all times. The soil should never be water logged or squiggy though. Moist soil is important for the seedling to grow and moist soil will ensure the seedling drops/throws its husk easily. Letting your soil dry out completely at this stage may well result in the seedling dying.
9 Keep warm and in a light place
Now that your plant pot with the seed has been watered, you will need to find a nice warm spot in the house for the pot. Preferably a sunny spot or a spot with good artificial lighting. Those among us that are going to be doing this on an ongoing basis should look at investing in a light (grow light) that can light the pot. Nothing more than a low voltage energy saving globe is required at this stage.
10 Look for the hook
All things being well and if you have followed this demonstration correctly, in a few days time, you will see the shoot breaking through the soil. This shoot is called a hook as it resembles a hook coming out of the soil. It will be all upward and onward from here!
Growing Peppers:
Peppers, like tomatoes, grow in well-drained fertile soil. Almost all peppers have the same requirements for successful growth. Plant them in good, well-drained, fertile soil â and make sure they get lots of sunlight and a good inch of water per week. In many ways, they mimic the same requirements needed for growing great tomatoes.
At Planting Time:
We plant all of our peppers with a good shovel full of compost in the planting hole, and then give them a good dose of compost tea every few weeks for the first 6 weeks of growth. We also mulch around each of our pepper plants with a good 1 to 2â³ thick layer of compost.
Peppers do very well grown in pots.
Select your desired size and color from the available option
LET OUR CUSTOMER SPEAK FOR US